How to Connect Docker with Pycharm

Let's see the steps we need to take to connect Docker with a Pycharm project.
1. Requirements
To start working, we need to check a couple of things beforehand.
Needed requirements:
- Docker is installed
- Pycharm Pro is installed
- Git is installed
When all requirements are met, we need to start Docker Desktop and Pycharm Pro.
2. Creating a New Project
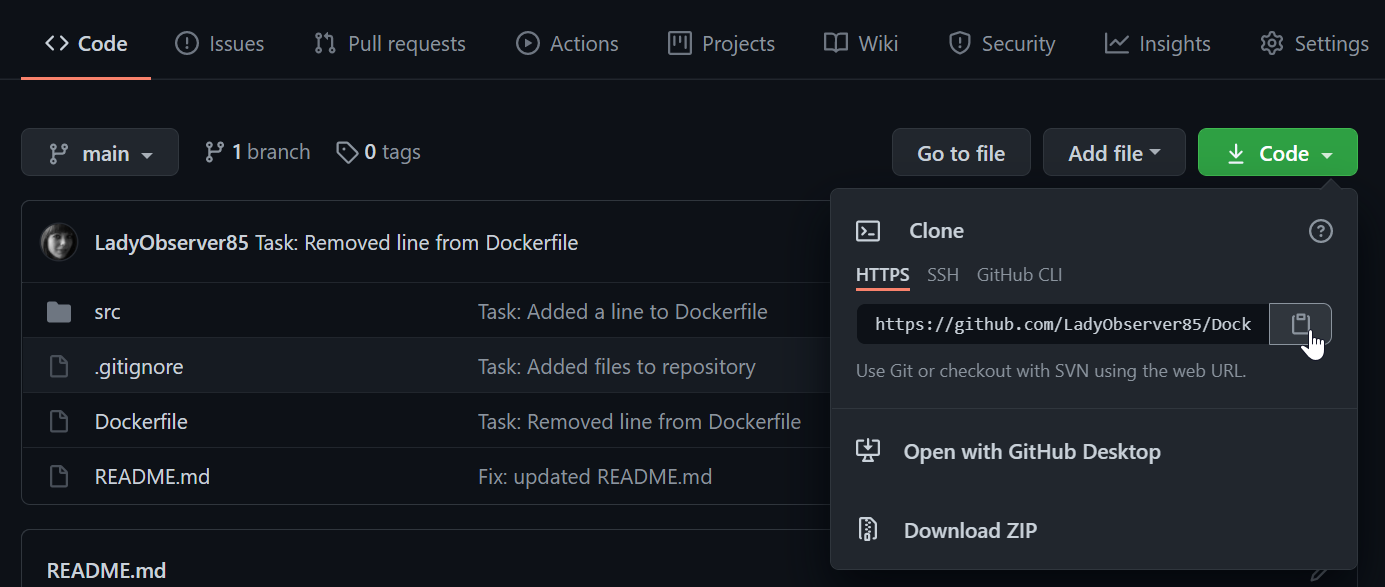
We create a new Python Project in Pycharm Pro. Then we go to Github and clone an existing repository.

Then we go back to Pycharm, click on VCS on top bar, then select Get from Version Control… After that, we paste the URL of the existing repository and we give a directory; finally, a quick click on Clone button.

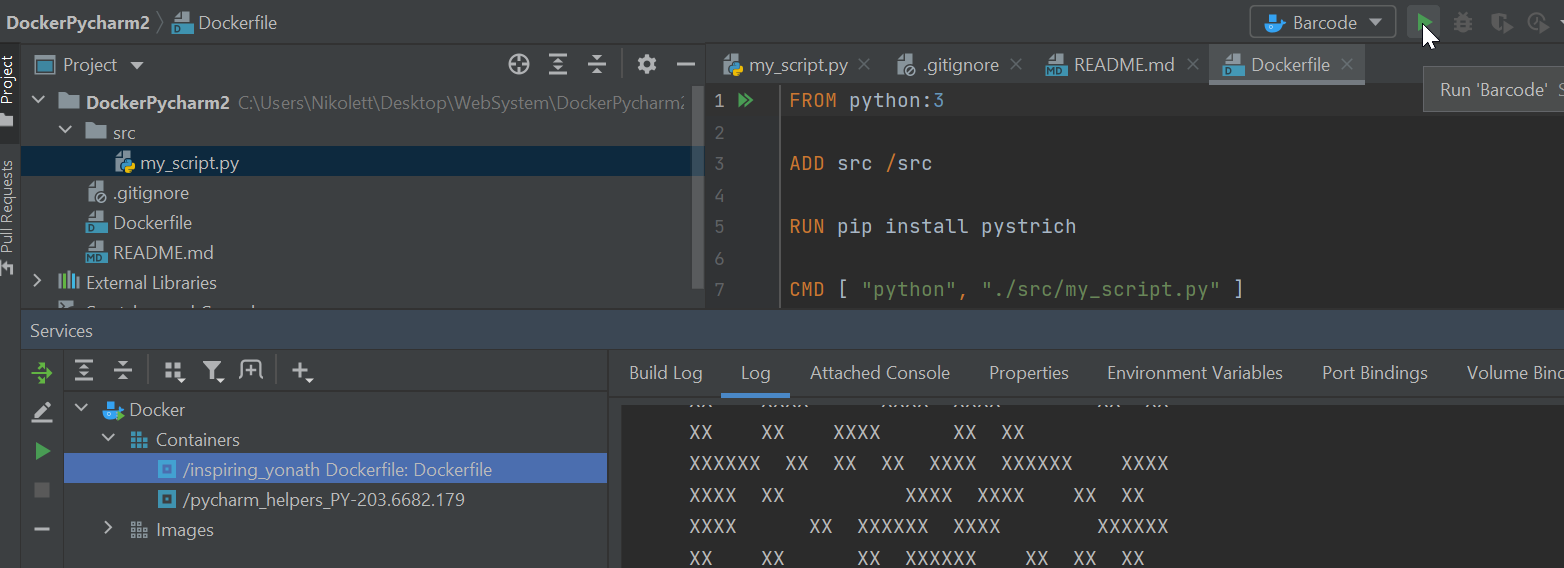
After we opened the project, we can check whether we got all the files successfully from the existing repository in Github. As the image below shows, we have a my_script.py file which includes the Python code, there is a .gitignore file, a README.md and a highly important Dockerfile.

3. Adding TCP Socket
We go to Docker now, because we need to look at whether Expose daemon on tcp://localhost:2375 without TLS is checked under Settings.

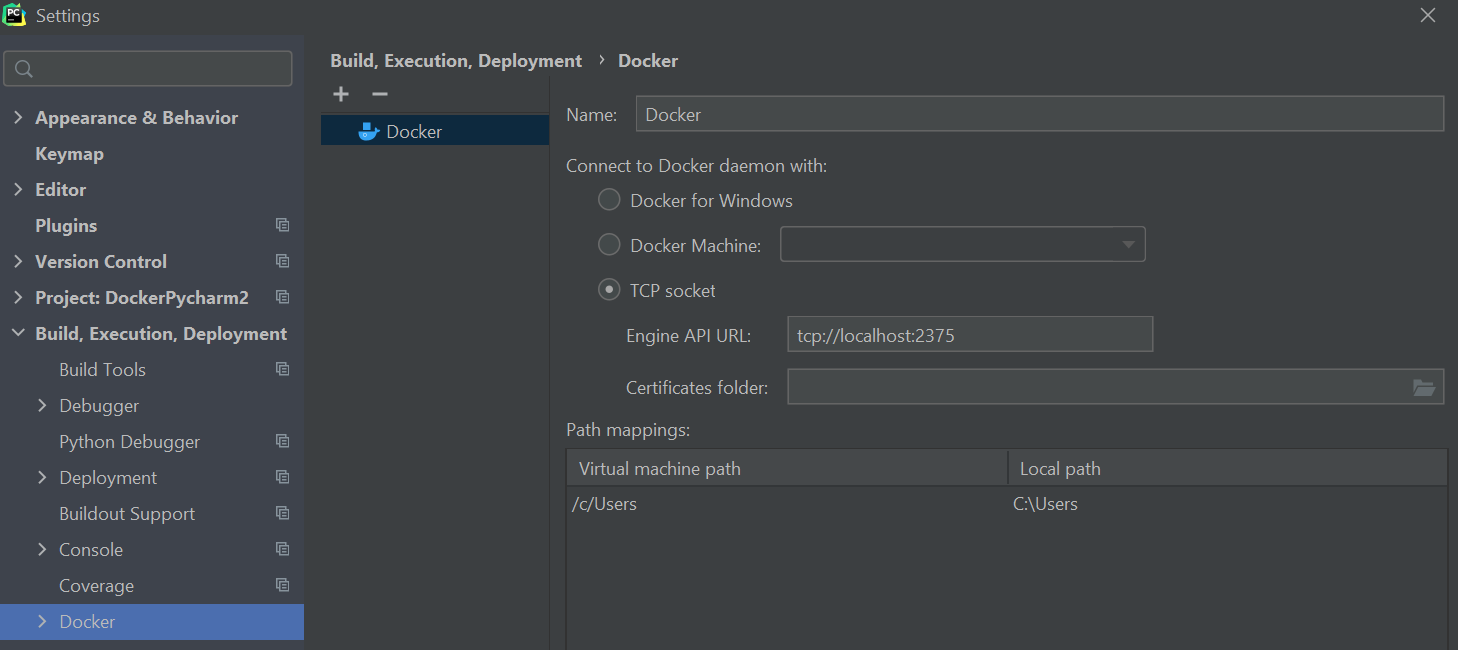
After checking TCP in Docker, we go back to Pycharm, to File, then to Settings, and here we select Docker under Build, Execution, Deployment. We click on + sign and select TCP socket; we type tcp://localhost:2375 into Engine API URL, and click on Apply.

4. Adding Configuration
We click on Add Configuration… on the top right corner, then on + sign; we select Dockerfile under Docker. We give a name (in this case: Barcode), then we choose Dockerfile in Dockerfile dropdown menu. We need to name the Image tag too (in this example: barcode). Before clicking on Apply and OK, we need to ensure that Run built image checkbox is checked.

Now we can try to run the program by clicking on green button on top. If it runs successfully (log shows), we have followed instructions properly so far.

5. Adding Interpreter
We need to click on Python on the bottom right corner, and choose Add Interpreter…, then Docker. Here, we click on Image name, the placeholder will be filled automatically; we accept it by clicking on OK.

Now, we should select Interpreter Settings… on the bottom right corner. We choose the newly added interpreter in the dropdown menu, and click on Apply, than OK.

6. Sharing Project on GitHub
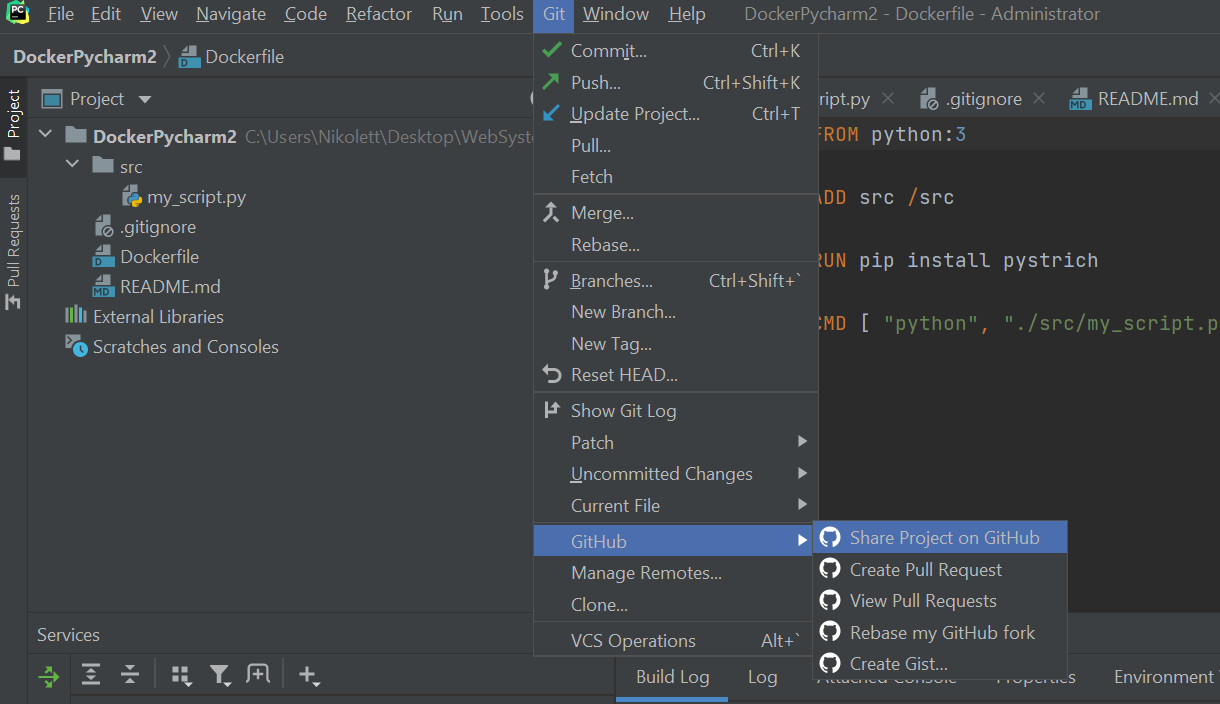
By adding interpreter, we successfully completed the whole tutorial. Therefore, we now know how to connect Docker with Pycharm. Our last task is just optional; we can share our project on GitHub by clicking on Git, then selecting Share Project on GitHub under GitHub.
